Mapping and Navigation with a Mobile Robot
Launch a quadruped with LiDAR, run Nav2 with SLAM, build a map, and save it.
This tutorial covers:
- Launching a simulation of a quadruped with LiDAR and camera
- Starting Nav2 with SLAM
- Navigating the world to create a map
- Saving the map for later use
Prerequisite: Complete the Launching the simulator with a robot tutorial.
Steps
-
Log in to the OLO platform at https://app.olo-robotics.com/.
-
Click Launch Sim in the top navigation or on the centre panel of the dashboard.
-
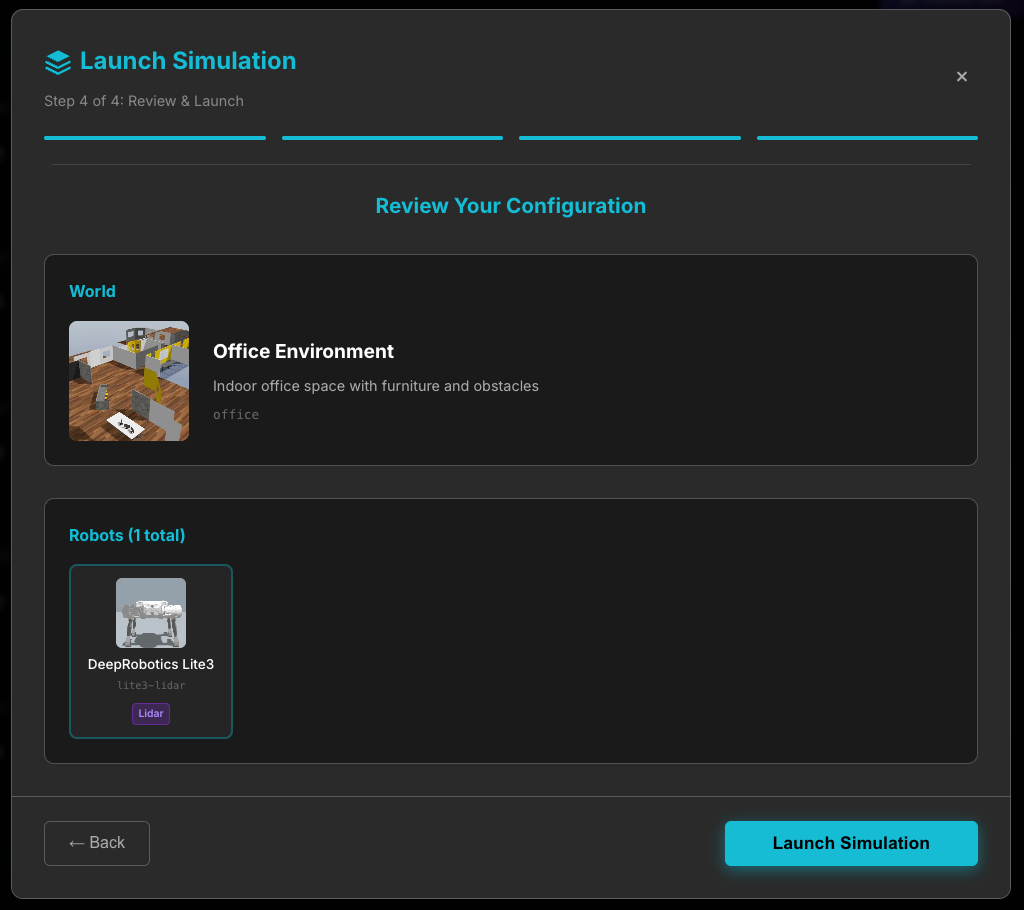
Select the Office Environment world and click Next.
-
Select the DeepRobotics Lite3 quadruped and click Next.
-
Enable LiDAR on the DeepRobotics Lite3 and click Next.
-
On the review screen, confirm your configuration, then click Launch Simulation and approve any browser permissions. The simulation will load in a window on the OLO dashboard.
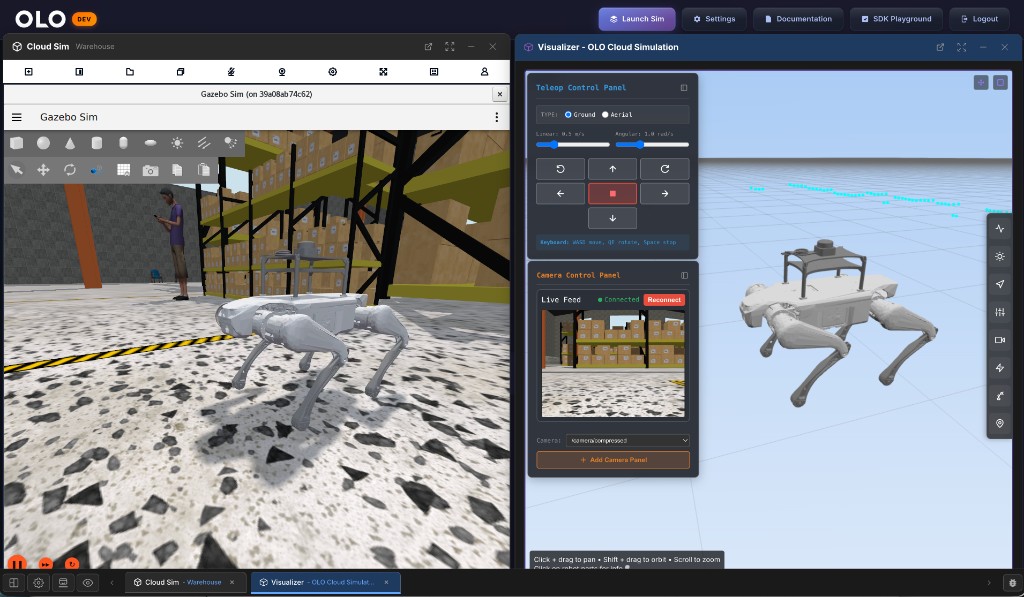
- When the simulation has loaded, the main robot panel appears. Along the bottom are data feeds and control panels you can explore.

-
Click the Visualizer button to open it in a window on the dashboard.
Think of the simulation as your real robot. The Visualizer shows the sensor data it sends to OLO. Note the icons on the right-hand side.
-
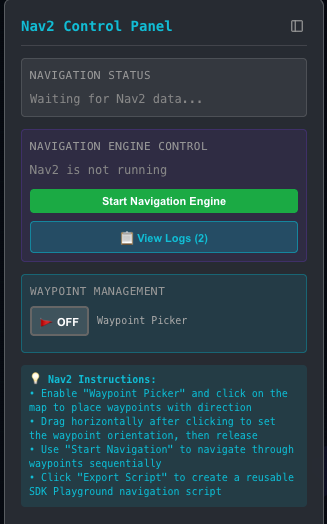
To create a map, start Nav2 and SLAM. Open the Navigation panel (arrow icon).
-
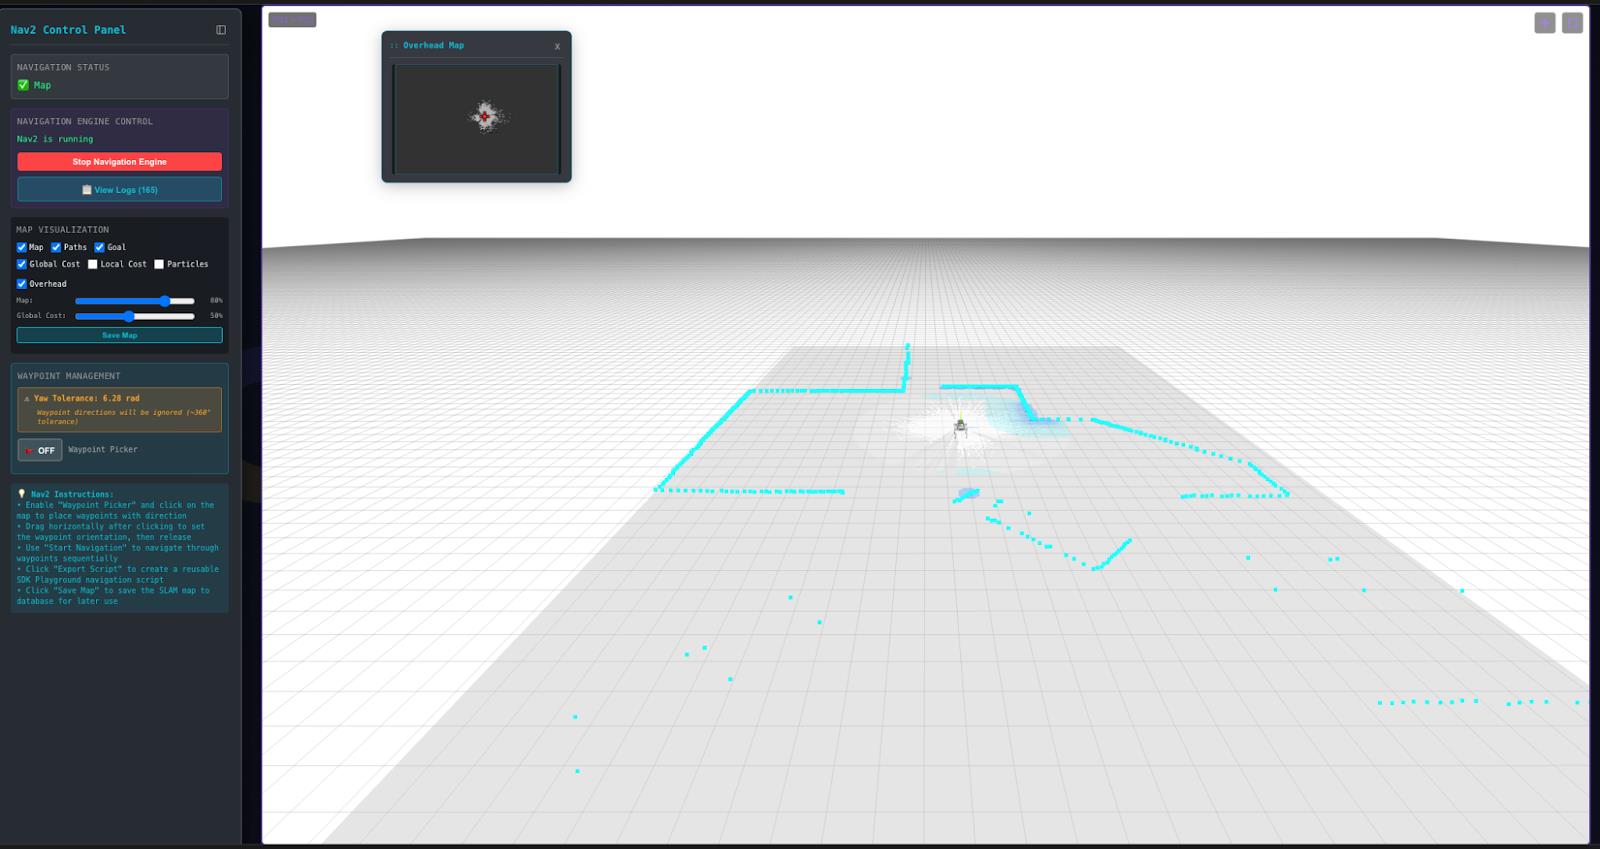
This panel shows navigation, waypoints, and mapping. Click Start Navigation Engine.
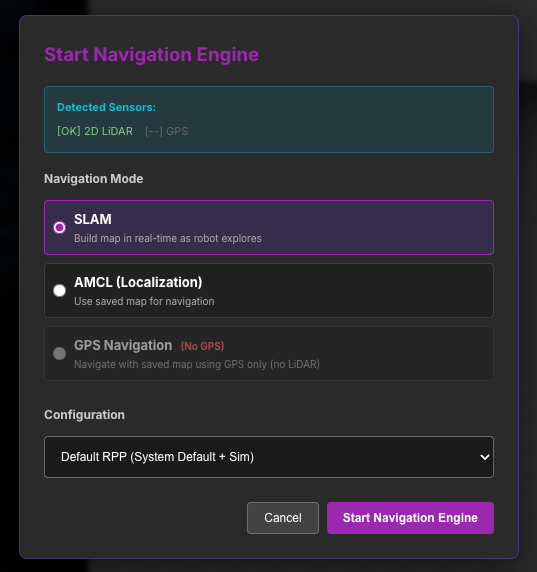
- In the pop-up, choose SLAM or AMCL. AMCL needs a saved map. For this tutorial, select SLAM, Default RPP under Configuration, and click Start Navigation Engine. The engine may take a few moments to start.
- Once the Navigation Engine is running, the visualizer will show an Overhead Map view. The map will build around the robot and a costmap will appear along edges detected by the LiDAR.
-
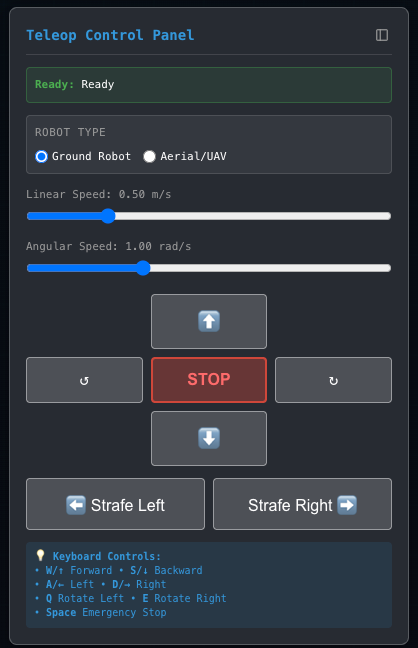
Drive the robot through the environment using the Teleoperation Control panel to build the map.
-
This panel lets you drive the robot around the simulation while SLAM builds the map in real time.
-
When you have explored the space and the map looks complete, click Save Map in the Nav2 control panel.
-
Enter a name and description (or keep the defaults) and click Save Map.

The next tutorial shows how to load a saved map and use it for navigation with AMCL.