Navigation with Waypoints and AMCL
Use AMCL, place waypoints, and run autonomous navigation between waypoints.
This tutorial covers:
- Starting Nav2 with AMCL
- Using AMCL to navigate the world
- Placing waypoints to direct the robot’s movements
- Autonomous navigation between waypoints
Prerequisite: Complete the Launching the simulator with a robot tutorial. You need a simulation with a mobile robot and a pre-recorded map (e.g. from the Mapping and navigation tutorial).
Steps
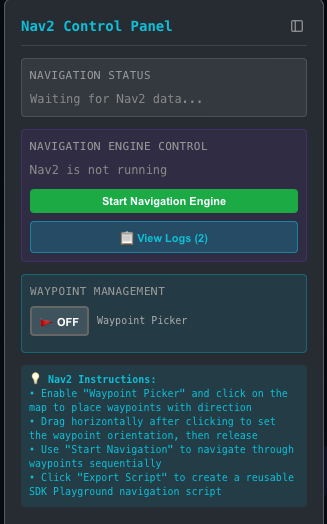
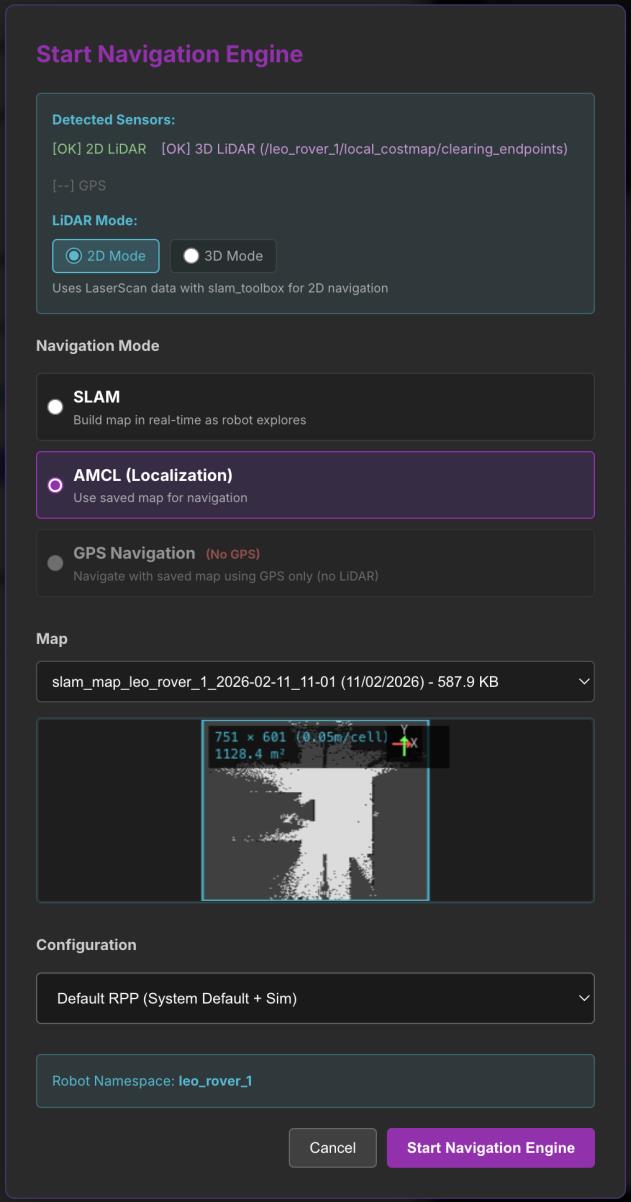
- With a mobile robot in a simulation that has a saved map, open the Nav2 control panel and click Start Navigation Engine.
- Choose AMCL (Localisation) and select the map to load from the dropdown (if you have more than one). Click Start Navigation Engine.
- When the map has loaded in the simulator, turn on waypoint management in the Nav2 control panel.
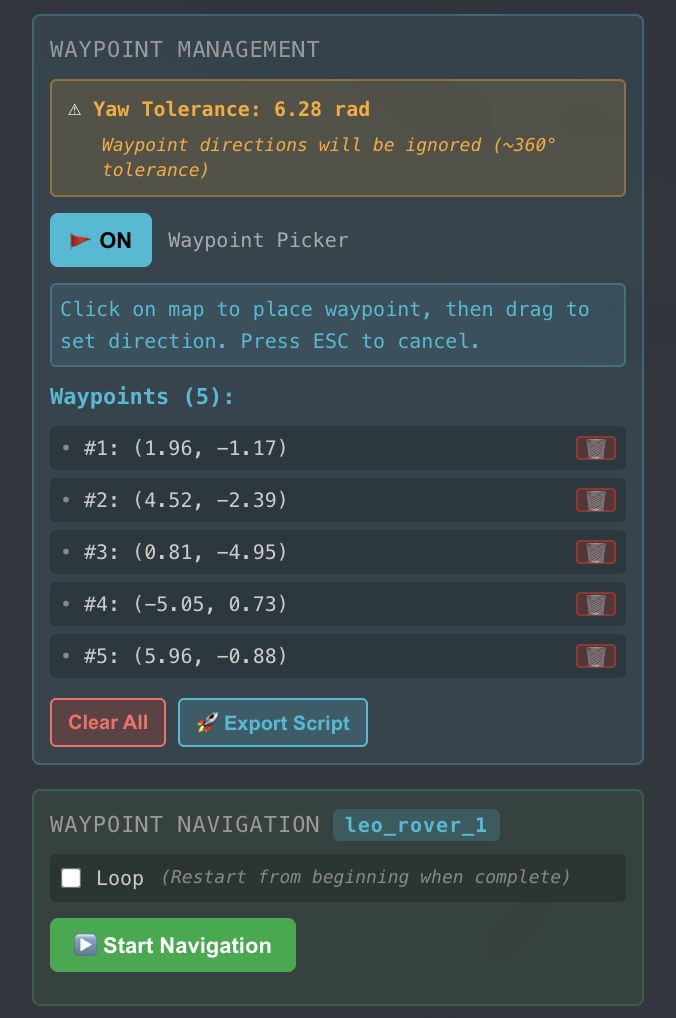
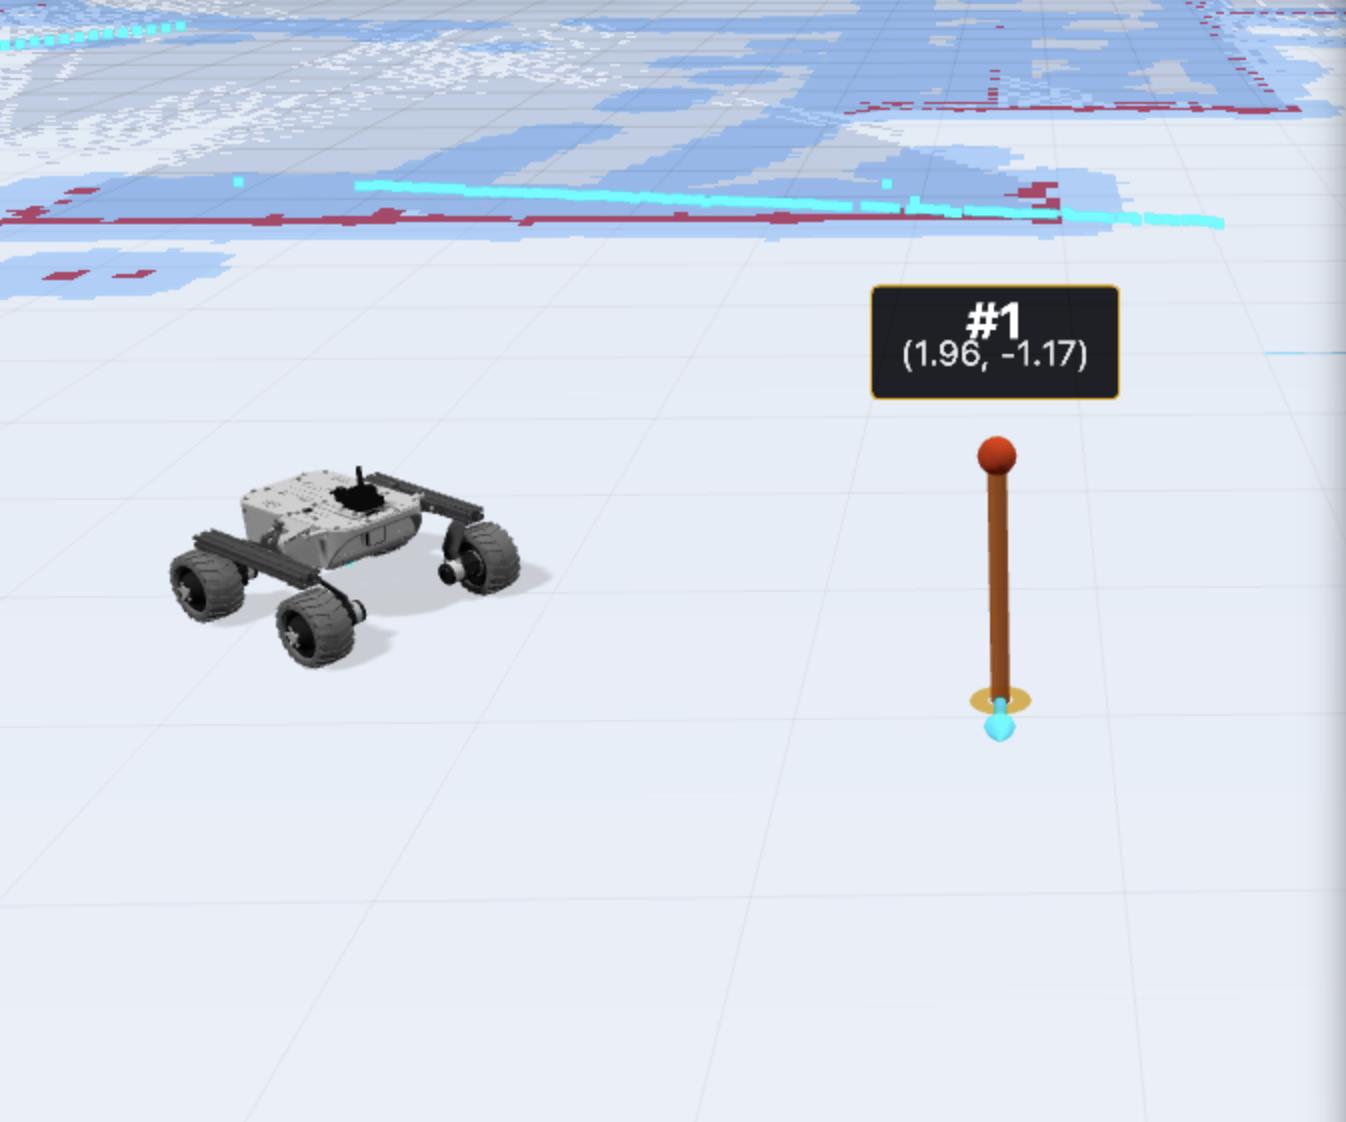
- With the waypoint picker on, place markers on the map in the visualizer. Click and drag to set the robot’s path from that marker.
-
Keep placing markers where you want the robot to go.
-
As you add markers, they are recorded with their coordinates in the Nav2 control panel. Use the trash icon to delete a marker.
-
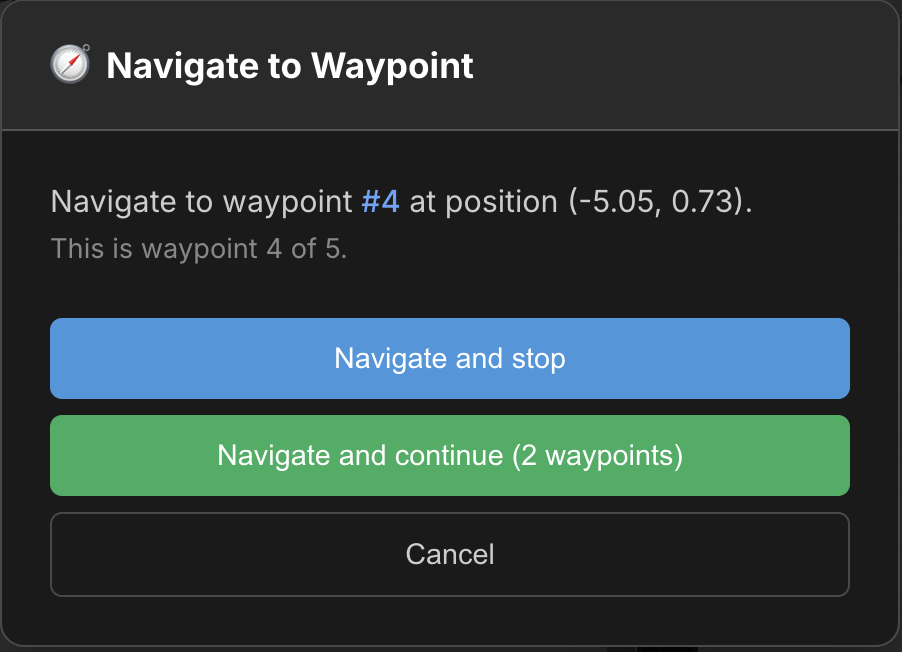
Select a waypoint in the panel to get options to navigate to or from that marker.
-
When all markers are placed, start the robot moving between waypoints by clicking Start Navigation in the waypoint navigation section of the Nav2 control panel.
You can enable Loop so the robot runs through all waypoints in order until you stop it.